What Are the Stages of Clay? Greenware, Leather Hard, Bone Dry and Bisque
· Updated · 4 min read
Most pottery advice names a stage and assumes you know it. “Trim when it’s leather hard.” Fine, but how hard is that? Here’s what each stage feels like, and what it’s good for.
| Stage | What it feels like | Good for | Recyclable? |
|---|---|---|---|
| Plastic (wet) | Cool, soft, takes a fingerprint | Throwing, pinching, coiling, rolling slabs | Yes |
| Soft leather hard | Holds its shape, still bends a little | Joining handles and slab walls | Yes |
| Leather hard | Firm like hard cheese, still cool | Trimming, carving, burnishing, stamping | Yes |
| Bone dry | Pale, light, chalky, room temperature | Waiting for the kiln | Yes (slake it) |
| Bisque | Hard and porous, clinks when tapped | Glazing, underglaze | No |
| Glaze fired | Glassy and strong (how watertight depends on the clay) | Using it | No |
Plastic
Fresh clay is roughly a fifth to a quarter water by weight, which is why it moves. Throwing, pinching, coiling and rolling slabs all happen here, and a twisted cutting wire takes it off the block. Tall wet walls slump, so a lot of handbuilding is waiting.
Soft leather hard
The piece holds its shape but still bends if you push. This is when handles, spouts, feet and slab walls go on, and the two pieces need to be at the same dryness. A wet handle on a drier mug shrinks more and pulls away, which is the usual reason handles come off (more in our cracking guide).
To stay here longer, put loose plastic over the pot and a strip of cling wrap around the rim.
Leather hard
This is the one people mean. Firm enough to flip upside down, soft enough that a loop tool takes off curls instead of dust. A fingernail leaves a mark but doesn’t dent the pot. If the tool chatters, you waited too long. If it smears, too early. The trimming guide goes through the foot ring.
It’s also the best time for sgraffito, stamps, burnishing and stencils. Later it all gets fussy. A set of needle tools does most of the fine work and trimming loops do the heavy removal.
Bone dry
The last of the water leaves and the clay turns pale and light. Hold it against your cheek: if it still feels cool, it’s still drying. Don’t fire a cool pot. Water left in the wall turns to steam in the kiln, and the thick pieces are the ones that burst.
It’s also the most fragile stage. A plate that would have flexed at leather hard just snaps. Carry it by the base with both hands. If a surface needs smoothing, use a damp sponge or a sanding sponge wet, not dry sandpaper, since the dust has silica in it.
Bisque
In the usual two-firing process, the first firing, usually cone 06 to 04 (about 1,830 to 1,950°F), makes the clay permanent but leaves it porous. That’s the useful part. Wet glaze soaks into it and leaves an even coat on the surface.
Bisque isn’t the only way. Some potters single fire (also called once-firing or raw glazing): they glaze leather-hard or bone-dry greenware and fire it once. It saves a firing, but it needs a glaze made to go on raw clay, and an unfired pot can soften or crack when it gets wet. Most studios and most commercial glazes assume a bisque firing first, so that’s the order this guide follows.
Dust it off before glazing, with a soft wool brush or a barely damp sponge. Dust and finger oil are the usual reasons glaze won’t stick (more on that in our glaze troubleshooting guides).
Glaze fired
Hotter again. Cone 6, about 2,230°F, is common for mid-range clay, though low-fire and high-fire bodies go elsewhere. The glaze melts to glass and the clay fuses. There’s no going back to clay.
Glazed doesn’t always mean watertight. That depends on how far the clay itself vitrified, meaning how dense it fired. Stoneware and porcelain fired to their full temperature soak up very little water. Low-fire earthenware stays porous under the glaze, so a mug or vase made from it needs a sound glaze coat inside, and can still seep where the glaze is crazed or missing. Your clay’s data sheet lists its absorption.
Handy at each stage
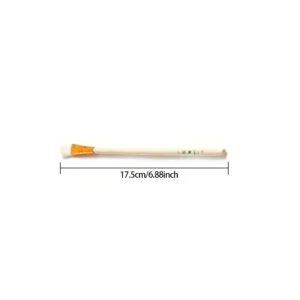
Use it for: Dusting a bone-dry or bisque pot before glazing
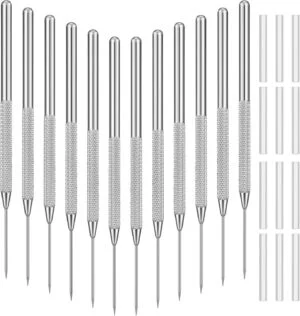
Use it for: Scoring, marking and carving at leather hard
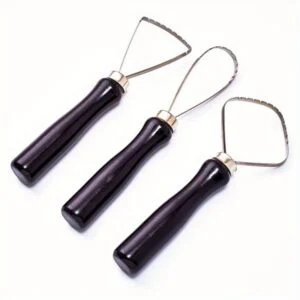
Use it for: Trimming bases and feet at leather hard
Recycling
Wet scraps go in the reclaim bucket. Trimmings and bone-dry failures can be dropped in water, slaked down and dried back to wedging stiffness on plaster. Bisque can’t be reclaimed, so take one last honest look at a pot before it goes in the kiln.
Sources and further reading: Digitalfire: Bisque, Digitalfire: Vitrification, Digitalfire: Earthenware.
Questions potters ask
Is greenware the same as bone dry?
No. Greenware is any clay that hasn't been fired, from a wet lump to a bone-dry pot. Bone dry is just the driest end of it.
Can I recycle bone-dry clay?
Yes. Drop it in water, let it slake, and dry it back to wedging stiffness. Bisque can't be recycled.
Can I carve or sand bone-dry pottery?
You can, but it's brittle and dusty. Sand with a damp sponge or wear a respirator, because the dust has silica in it. Most carving is easier at leather hard anyway.
Why does bisque feel chalky?
The first firing leaves the clay hard but porous. That's on purpose: it pulls water out of the glaze and leaves an even coat behind.
Can you glaze before bisque firing?
Some potters glaze bone-dry greenware and fire once. The pot is fragile to handle and the glaze goes on differently, so most beginners bisque first.